Getting and handing in work with GitHub
Introduction
Starting in week 2, you will use GitHub to get each lab and to hand in your work. Before class that week, read this page and do the one-time setup below. It takes about fifteen minutes. You need the invitation to the course’s organization first, so watch for it in your email after you send your GitHub username. After the first time, the short version in the lab guide is enough.
What git and GitHub do
Your work for this course lives in folders on your laptop, like the week01_first_steps folder you made in 010, with your notebooks and data inside. git keeps a history of the changes you make to a folder. Each saved step in that history is a commit, and each commit has a short message saying what changed (Figure 1). If you break something, you can always see (and get back) an earlier version. It is a little like the version history of a Google Doc, except that you decide when to save a version and you label each one.
A folder that git keeps a history of is called a repository (or repo). It looks like any other folder. git keeps the history in a hidden folder inside it called .git, and you never need to open it.
GitHub is a website that stores copies of repositories, history and all. Scientists use it to share code and data and to work on code together. In this course your laptop and GitHub each have a copy of your lab’s repository (Figure 2). When you clone a repository, you make a copy of it on your laptop, and you do that once for each lab. When you push, you send your new commits back to GitHub. You hand in your work by pushing. When you pull, you bring down anything new from GitHub, for example a change made on GitHub’s website. The Sync Changes button in VS Code does both, a pull and then a push.
Your repositories for this course are private, so only you and your instructors can see them. (In group projects, your group members will see the group’s repository too.) Please do not make them public.
One-time setup
Join the course’s organization
The course’s repositories live in a GitHub organization, a shared space that belongs to the course. After you send your GitHub username (see 000), your instructor adds you, and GitHub emails you an invitation. Open the email and accept the invitation. (It also shows up in your notifications when you are signed in at https://github.com.) The invitation expires after seven days. If yours has expired, ask your instructor to send a new one.
Tell git who you are
Every commit records a name and an email address, and anyone who can see the repository can see them. To keep your real name and email address out of the course’s repositories, use your GitHub username and a private email address that GitHub gives you.
- On GitHub, click your profile picture in the upper right corner, choose Settings, and then choose Emails in the list on the left. Check Keep my email addresses private. GitHub then shows an address that ends in
@users.noreply.github.com. Copy it. - Open a terminal in VS Code (Terminal › New Terminal) and run these three commands. In the first, put your GitHub username between the quotation marks. In the second, paste the address you copied. It looks something like
12345678+username@users.noreply.github.com. (If you already use git under your own name for other work, these commands would change it everywhere. Troubleshooting shows how to use them for your CSCI295 folder only.)
git config --global user.name "your-github-username"
git config --global user.email "paste-the-address-here"
git config --global pull.rebase false
The third command tells git what to do when your laptop and GitHub both have new commits (for example, a change made on GitHub’s website). Without it, Sync Changes fails in that situation. Nothing is printed if the commands work. To check, run git config --global --list and look for the three lines you just set.
Do not put your name in your notebooks or in any other file in your repositories either. Your username tells us whose work it is.
Sign in to GitHub from VS Code
The first time VS Code needs to talk to GitHub (usually when you clone your first repository, below), it will ask for permission to sign in to GitHub. Click Allow. Your web browser opens a GitHub page asking you to authorize VS Code. Sign in if you need to, approve it, and then go back to VS Code. You will not need to do this again. On Windows, a window from Git may ask you to sign in to GitHub instead. Choose to sign in with your browser.
Get this week’s lab
Accept the assignment
Each lab has an assignment link, which you will find on the schedule. Open it in your web browser. We hand out labs with Classroom 50, a free tool that works entirely through GitHub. It keeps its records in the course’s GitHub organization, not on a server of its own. The first time, it asks you to sign in with GitHub. Click Sign in with GitHub and authorize it. (If it asks whether to share anonymous usage statistics, you can decline.)
Click Accept assignment. Classroom 50 makes a private repository for you, named after the course, the lab, and your GitHub username. When its checklist finishes, click Open repository. On the repository’s page on GitHub, click the green Code button and copy the web address (URL) that it shows. It ends in .git.
Clone the repository
In VS Code, open the Command Palette (command + shift + P on a Mac, Ctrl + Shift + P on Windows). It is a box at the top of the window where you can type the name of any VS Code command. Type Git: Clone and choose Git: Clone. VS Code asks you to provide repository URL. Paste the URL you copied and hit return.
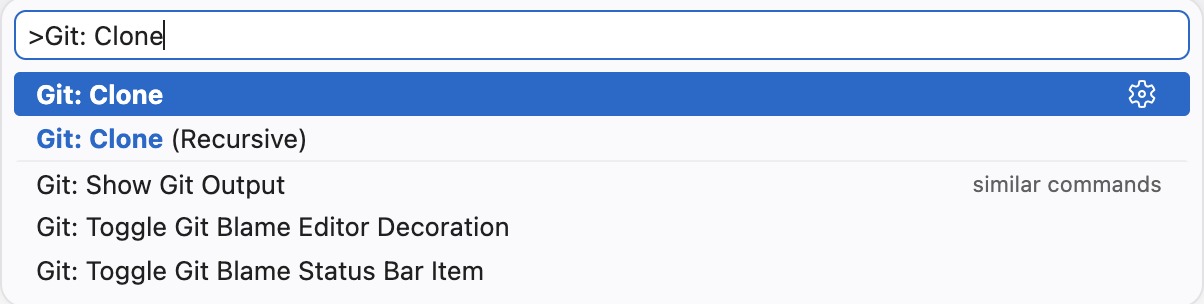
A window opens for choosing where to put the repository. Go to your CSCI295 folder and click Select as Repository Destination. When VS Code has finished cloning, it asks whether you would like to open the repository or add it to the current workspace. Click Open (not Add to Workspace). If VS Code asks whether you trust the authors of the files in this folder, click Yes, I trust the authors. (Your instructors made them.)
You now have a lab folder inside CSCI295, named after the repository, and VS Code has it open. It already has the folders you know from week 1 (notebooks, data/raw, data/processed, and outputs), the data for this week in data/raw, and the lab’s pyproject.toml and uv.lock files. Folders that would otherwise be empty hold a file called .gitkeep, because git does not keep track of empty folders. Leave those files alone.
Set up the lab’s Python
The repository lists the packages the lab needs but does not include them, so you install them on your own laptop. Open a terminal (Terminal › New Terminal) and run
uv syncuv reads pyproject.toml and uv.lock, installs Python 3.14 if needed, and creates the lab’s .venv folder with exactly the packages listed. Everyone in the class gets the same versions, so your code will do the same thing on your laptop as it does on your instructor’s. If VS Code asks whether you want to select the new environment for the workspace folder, click Yes.
The .venv folder is not in the repository, because it holds thousands of files that uv can rebuild in seconds. A file called .gitignore lists things git should leave alone, and .venv is on it. (The Explorer shows it dimmed for that reason.)
Committing and pushing
Work on the lab the same way you did in week 1. Make your notebook in notebooks, choose the .venv kernel, and save often.
Commit your work
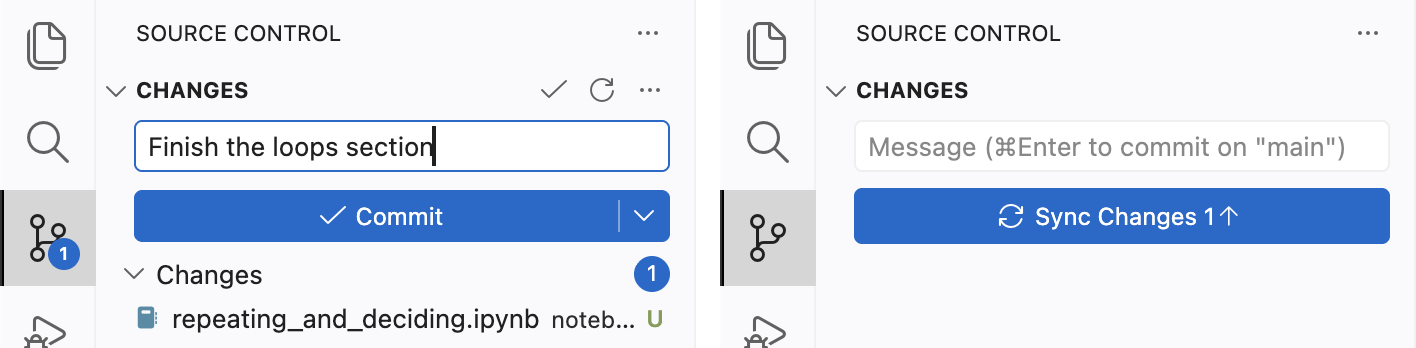
First save your notebook, because git only sees changes that are saved. Then click the Source Control button in the bar on the left (the icon that looks like a branching line), or press control + shift + G (Ctrl + Shift + G on Windows). The panel lists the files that have changed since your last commit. Type a short message in the box at the top that says what you did, like Finish the loops section, and click Commit.
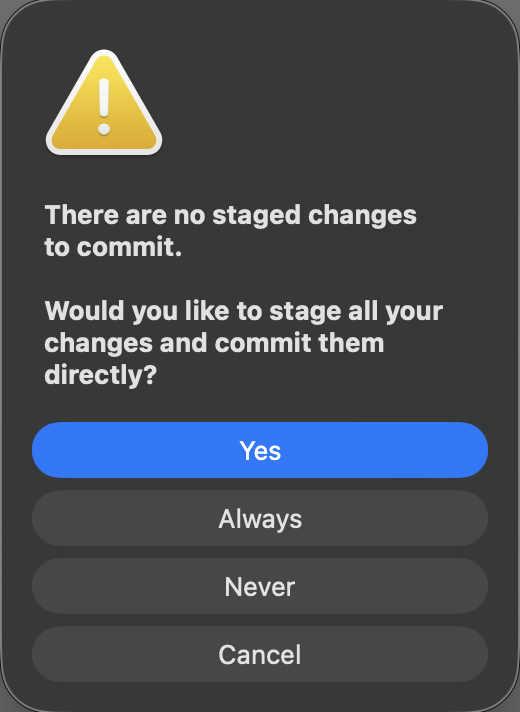
The first time you commit, VS Code says that there are no staged changes and asks whether you would like to stage all your changes and commit them directly. Click Yes, or Always so that it stops asking. Staging just means choosing which changes go into the commit, and we always stage all of them.
Push it to GitHub
A commit is saved only on your laptop until you push it. After you commit, the button in the Source Control panel changes to Sync Changes. Click it. VS Code pushes your commits to GitHub (and pulls down anything new from GitHub first). It tells you that it will pull and push commits from and to origin/main. Click OK, Don’t Show Again, so that it stops asking. It may also ask whether it should periodically run git fetch, which means checking GitHub for new commits now and then. Click Yes.
To check that it worked, go to your repository’s page on GitHub and reload it. Your commit message should appear next to the files you changed.
How handing in works
If your work is only on your laptop, you have not handed it in. We look at the last version you pushed to GitHub before the deadline on the schedule.
Commit and push often, not only at the end, for example after each section of a tutorial. That way you have a backup of your work and a record of how it developed.
Before your final push for a lab, click Restart and then Run All in your notebook so that it runs from top to bottom, check the results, and save it. (If Run All stops at an error you made on purpose, turn that line into a comment.) We read the notebook with its output saved in it, and we may also run it ourselves from the files in your repository.
If something goes wrong (a push is rejected, VS Code says there is a conflict, or you are not sure what state your repository is in), stop and look at Troubleshooting or ask. Please do not delete the folder and start over, because it can almost always be fixed.
Coming back to a lab
You only accept the assignment, clone the repository, and run uv sync once for each lab. When you come back to the lab later, open its folder and your notebook the way you did in week 1 (see Coming back to your work in 010), and click Run All to run your cells again.
Before you start working, sync the lab with GitHub in case something changed there, for example if you edited a file on GitHub’s website. Click the circular arrows next to main in the lower left corner of the VS Code window. They do the same thing as the Sync Changes button, so they pull down anything new from GitHub and push any commits you have not pushed yet. If you work on an old copy of a notebook that has also changed on GitHub, git may not be able to combine the two, and you end up with a merge conflict.